

Using our 100% vegetable oil soap
You may remember a few months ago I spent a bajillion hours waiting for some 100% olive oil soap to reach trace then, as a glutton for punishment, I decided to make a second batch of another 100% vegetable oil soap the same day.
We started using the 100% olive oil soap and have got through a few small bars of it – John likes it a lot. He likes that it doesn’t lather much (as it, conversely, encourages him to use less of it) and it doesn’t smell perfumed either (he hates perfumed things).
In a “why change what’s working?” way, we hadn’t tried the other set of soap – the 100% veg oils one – but I decided that should change this week!

The non-lye ingredients of the 100% olive oil one are pretty obvious – the 100% veg oil one a little more complicated — but still, everything bought from the supermarket. I used Frugal Queen’s recipe and method – olive oil, sunflower oil and Cookeen (solid veg shortening) – just leaving out the scent. It traced faster than the olive oil one thankfully!
The resulting soap is softer than the 100% olive oil one (apparently that’s down to the veg shortening) and not quite as pale – a soft lemon-ish colour. (It had some soap ash on it when I first picked it out of its drying place, which I’ve mostly scrapped off – hence the not-perfectly-smooth edges and slight colour variation on the before use picture above). It lathers quite a bit more than the olive oil soap – not crazy commercial soap levels but noticeably more. It did feel more like shop bought soap though – leaving my skin feeling a little “squeaky”. That’s not necessarily a bad thing, just a thing.

I spent £5.27 on the ingredients (£1.89 on the olive oil [on offer at Netto at the time], £1.06 on the sunflower oil, £1.43 on the shortener and £0.89 for the caustic soda needed for this recipe – based on a 500g bottle from Wilkinsons; and I used tap water and no scent) – which I think out frugals the Frugal Queen ;) I ended up with 2850g of finished soap – the bars were randomly sized but if they were normal 100g-ish bars, that would be about 19p a bar (or about 24p a bar if they’re 125g, which was the weight I used to work out the per-bar cost of the 100% olive oil ones [35p]).
As I said regarding the 100% olive oil ones, I’m not sure I enjoyed the process enough to do it often but I like the idea of making a big batch every six months/year as necessary. Before the next batch though, I’m going to try handmilling some of the ones from this batch to try out different (frugal, supermarket-sourced) scents – and might try turning a bar into liquid soap too as that’s handy when my hands are filthy from gardening.
Has anyone else made the Frugal Queen’s 100% veg oil soap? What did you think of it? Or do you have any 100% supermarket-sourced veg oil soaps? Or suggestions for frugal scents and any handmilling/liquid-soap-from-bar making advice?
Read MoreCharity shopping, planting and making – my fun weekend :)
Last night on Twitter, I asked people to put their hands up if they’d had a lovely afternoon in their garden/at their allotment yesterday and I got a sea of hands waving back – it is really bloody lovely out there at the moment, isn’t it?*
On Saturday, I blew my no spending month thing out of the window by going to a craft sale at Kirkgate Studios in Shipley – well, actually, I only bought two balls of wool and a postcard from there but since I was in Shipley… As with most poorer areas, you’re less likely to find exclusive designer goodies going for £1 but with eight charity shops, there is at least plenty of choice.

I bought 13 books. Thirteen! But 10 of them were (drama) work-related and two Monica Dickens books I’ve been considering buying off Amazon/Abebooks for a couple of months, so it wasn’t all spur-of-the-moment spend-spend-spend. Plus, eight of the books were in a 4-for-£1 offer so all 13 books cost £7.70 in total — not too bad. (And I’ve already found seven books to give away under my “buy 2, get rid of 1 old one” rule.)

I also bought a cute small plate to be our kitchen soap dish for 50p, another little dish for 50p because it was a tourist souvenir from Baghdad (and how often do you see those?) and a fake-patchwork duvet cover for £1.50, which I’ll turn into a cheat quilt like Lynsey’s from SwirlyArts made this time last year — again, something else I’ve been looking out for because I love Lynsey’s quilt so I was very happy to find it :)
Anyway, after all that spendery on Saturday, I declared Sunday would be a day for the garden. I didn’t get as much done as I’d hoped (I’ll have to have some time off this week to get the rest finished) but I potted on lots of tomatoes & pumpkins, sowed nearly all my potatoes as well as more lettuce & annual herbs. I also made two new scrap wood planters – not the prettiest but certainly the easiest ones yet.

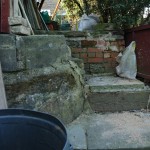
I believe the sides are old scaffolding planks or similar — John’s dad had a trailer full when we went over the other day. He said “they’ll be great for burning” until he saw me hugging them to my chest and squealing with planter-building delight. They’re about 3ft by 1ft by 8inches deep, with reclaimed decking for the bottom supports. Again, they’ll be lined but I think I’ll see how far I get cleaning them rather than painting them as I like the character of the wood. (Apologies for the somewhat shadowy photo – was in a hurry, camera battery was dying.)

I also made some super quick wire wall mounts for some herb pots in the greenhouse – I’ve run out of room on my staging/the floor at the moment so wanted these little pots (and five with baby sage seedlings in them) out of the way. I’ll have to make sure they don’t dry out too much but they’ll probably be fine for now.
Oh, and I also cleaned the windows for the first time this year on Saturday evening – they were, as you may expect, rather filthy but I did a rather good job, even if I do say so myself – not a single water spot in sight! ;)
* (People in parts of the US still in the soggy tailend of winter and people in the southern hemisphere who are heading into full on winter – sorry to gloat about our sunshine. We’re just not used to this nice weather in the UK and you know, talking about it is our national pastime.)
What did you get up to this weekend? Any frugal fun? Or planting progress?
Read MoreAdventures in frugal vertical gardening – ideas for planters?
Got a dull flat wall I’d like to “vertical garden” up – need to make/acquire/modify some planters. Any suggestions? Need to be cheap/free :)
I asked that grammatically horrific question on Twitter last Thursday but I thought I’d bring it over here as well to catch non-Twitterers but also to put together some of my ideas/questions.
I’ve actually got two flat walls that would be perfect for wall planters and the like but I’m going to focus on the bigger one first. It’s on the greenhouse level of our garden and has a super narrow (about a foot wide) bed at the bottom of it. I intended to grow beans and peas in the bed last year – trained up the wall – but the slugs put an end to that. Courgettes grew quite happily in it after all the peas got eaten but I think from this year onwards, it’ll work better as shrubby-herb bed (especially as it means I don’t have to put those elsewhere now). Since they won’t climb up, there will be a lot of vertical height going spare. More of an issue for when I reach the planting stage but if anyone’s interest, the wall is east facing, receiving sun until about 1-2pm.
So what can I use for planters? There are lots of different planters available to buy – in all sorts of materials – but they seem to fall into a few general categories:
- shelves – from basic wood to fancy wrought iron curves & cages. Even the flatter, plainer shelves, usually have a rim or lip around the sides so pots don’t get blown out or down. For use with separate pots.
- window boxes – wall mounted troughs which, unlike the shelves, are planted into directly.
- half moon wall planters – semi-circular troughs a cross between window boxes and hanging baskets.
- hanging baskets – suspended away from the wall on a strong bracket or a hook. A few levels can be hung together like rainchains.
- “floating” pots – either like this lead one from Gardeners World, this integrated hooks/trellis arrangement or just pots on hooks. Some, like the lead one, have pots fixed in position, whereas others can be moved around – for example, pots with individual hooks attached can be put anywhere on a trellis.
- bags – suspended bags filled with soil, with holes cut into the (randomly) bag for the plants. Felt pocket hangers are a cross between the floating pots and these bags. Some bags (like better feather duvets) are divided into different compartments so the soil doesn’t all slump to the bottom – but this does restrict root growth.
- complex living wall systems – patented growing secrets! Lots of different designs/methods – some of them seem to be grid structures filled with compost, others structured bags behind trellis type things, others still who knows? possibly pure magic.
I certainly can’t afford a fancy living wall system but even filling the space with purpose-built troughs/window boxes, wall planters and hanging baskets would cost more than I’d like. (I do have some that I can repurpose from elsewhere in the garden but I’ll have to replace those containers somehow or I won’t be adding to my overall growing space. Some are also self-watering which would be beneficial). As always, I’ll keep an eye out on eBay/Freegle for giveaways but in the meantime, I guess I need to get making…
Read MoreMy first soap
I made some soap for the first time last week. It took FOREVER to trace. I wrote a blog post about that but didn’t explain any more about my soap making because, well, frankly, at that point, it looked like it was going to be a big fat fail.

Even though it had reached what could be considered trace, it still felt very sloppy when I was pouring it into the moulds and even overnight and over the next night, it was harder but still very soft. The directions I’d read had said to take it out of the moulds after a couple of days – mine would have still blobbed all over the place at that point. But it clearly was still curing and it was more than ready to leave the moulds today – a week after it was made. (It was probably ready for tipping out by Wednesday – it was a lot paler and seemed like it would hold its shape – but I was just busy with other stuff so thought it would be better to leave it rather than rush it.)
I made two batches – I’ll post the recipes & cost breakdown once I know that it is actually a success and they’re good to use but for now, I’ll say the first was a 100% olive oil soap, and the second was a third olive oil and two-thirds other generic veg oils/shortening — everything bought from supermarkets. As I’ll explain more when I review the two soap-making books I bought, we’re pretty utilitarian when it comes to our soaps – we want them to get us clean, to not be harsh & drying, and to smell alright. We want them to create minimal waste & be as frugal as possible. This is particularly important for me while I’m learning the skills – if I make a mistake, it’s nothing more than a few quid and some time; if I was buying neem oil, shea butter and essential oils, I’d not only be paying more for the ingredients, I’d be paying for postage & packing too and having to wait for them to arrive too.
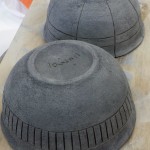
As expected, the 100% olive oil soap is considerably paler & already harder than the mixed oils one – the veg shortening keeps it that bit softer. Because I ended up making a lot more than I’d intended in one day, I had to get a bit more creative about the moulds than I thought I would at the start. The 100% soap used an old plastic fruit tray & an old deep oven tray as moulds.
The mixed oil one got the choicest mould – a long flat tray with a lid (from when we bought a big pack of ostrich burgers from the farmers market) – but its overflow containers weren’t as suitable really – one of the square olive oil bottles and an ice cream bucket. They were more awkward to use but have resulted in interesting shaped soaps.

Once I’d popped everything out and cut it to size, I thought “I’ll put this in the airing cupboard to keep curing and drying for the next few weeks”. Then I had a “doh!” moment – the airing cupboard got pulled out by our bathroom refitters on Monday! I hadn’t acted quick enough to keep the racks I’d made which would have been perfect as drying racks (I did though save the cupboard doors – one of which I used as a chopping board for the soap, and the others will make a raised bed). So anyway, I needed something to use for drying racks so yet again, I raided the scrap wood store and twenty minutes later:

A drying rack! It’s a very rough & ready job, done without any measuring hence the slats being a bit wonky, but it’ll do fine for this purpose.

Now the soap is on the new rack drying in the attic room. I guess I shouldn’t declare it a resounding success just yet until it’s finished and we can try it, but after a few days of foreboding failure, it looks a lot more hopeful now!
Read MoreFebruary – end of month review
February seems to have flown by and has been a lot of fun — a good balance between work, household/growing/making productivity, crafting, and future planning.

Goals in 2011 progress
I’ve started making progress on some of the more long term goals – started sowing seeds which will hopefully turn into homegrown veg and again, I’ve made things with wood which will help with my “make a piece of furniture” goal. I haven’t baked each week but I’ve tried a few new recipes – including some lovely cinnamon biscotti – so at least I’m doing bits. (We’ve not been baking much bread recently because it’s still a bit too cold for yeast to rise properly.)
From my secondary list, I’ve also tried making soap, although I’m not sure it’s been a success yet (the soap in the moulds is still very soft). I also made a notebook (above) from scrap paper and a curtain sample, which wasn’t on my list but I had so much fun doing it that I think “learn different book binding techniques” should be on there now! Finally, we’ve been working to reduce our food waste (and save money/our sanity) by preparing meal plans – we’re not sticking to them 100% but they’re working well in general.
Buy less than 12 items of clothing in 2011
In my no more than 12 items of clothes in 2011 challenge, my tally is still zero — I’ve not bought anything this month either. I have though started looking at stuff rather than just shutting myself off from the possibilities – partly because I need to develop willpower rather than just avoiding temptation and partly because I feel like it’s time I had something new to wear (I’ve not bought any clothes since November – and that was only replacement jeans). It’s when I’m getting ready to go to drama – the classes I teach or rehearsals etc – because my suitable clothes are such a subset of my wardrobe — they not only have to be neat enough to wear outside the house, they can’t be too cleavage-y (which is a problem with a lot of my clothes because my body is too cleavage-y!) and they have to be suitable for wearing as a supposedly-responsible adult in front of teenagers. I have plenty of plain t-shirts to wear but a limited amount of warm clothes so I’ve been getting a bit bored – and as we’re preparing for a production at the start of April, I’ll be there a lot more regularly which will mean cycling through them more. So long story short, I might break into my quota in March.
Growing stuff & the chickens
Read MoreAbout Me
 I'm Louisa and I live a Really Good Life. I grow, I craft, I cook and I make the most of what I've got instead of forever craving more.
Read more the site on the About page, or browse through the categories below.
I'm Louisa and I live a Really Good Life. I grow, I craft, I cook and I make the most of what I've got instead of forever craving more.
Read more the site on the About page, or browse through the categories below. -
 Taking Stock – May 2015
-
 Making a little more progress at the allotment
-
 Allotment, end of round 1 (ding ding)
-
 Yay, allotment!
-
 Taking stock – June 2014
-
 Do it better
-
 Stitching etc tips from the Knitting & Stitching Show
-
 No Spend November
-
My winter to-do list 2013
-
 Taking stock: a ‘what I’m up to in my absence’ meme
-
 Plummy solid square crochet blanket
-
 Attack of the Crochet Claw
-
 Using up the glut: Marrow cake recipe
-
Spicy marrow chutney recipe
-
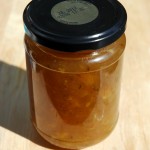
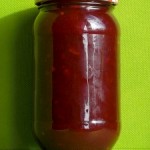
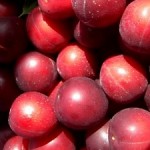 Wild plum/cherry plum jam recipe
-
 Easy marrow and ginger jam recipe
-
 No omelettes allowed: my five favourite recipes to use up lots of eggs
-
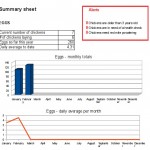 My chicken keeping spreadsheet
-
Plummy solid square crochet blanket
-
 Spicy plum chutney recipe: plum & chilli jam
-
 Foraging for wild food: do you forage near roads?
-
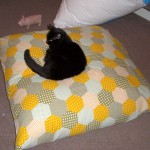 Upcycle an old duvet cover into a frugal bean bag
-
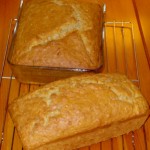
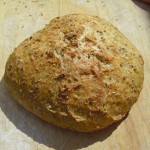 The wonder that is slow rise bread
-
 How I line dry clothes in winter: my top five tips
-
 My low-spend '11: buy less than 12 items of clothing in 2011
-
Cold smoking cheese - taste testing the first batch
-
Using up the glut: Marrow cake recipe
-
How I line dry clothes in winter: my top five tips
-
Spicy marrow chutney recipe
-
 Washing in winter: ideas for reducing laundry?
-
Foraging for wild food: do you forage near roads?
-
Your favourite fiction books with simple living characters/themes?
-
 How I spent my Tuesday afternoon
-
 We *heart* books too (warning: picture heavy post!)
-
 Portion control
-
Baking things that'll last
