

Quick crocheted flask/water bottle holder pattern
My building plans for last weekend (the mezzanine level thing and a mini ark for quarantine/broody hens) fell through because I felt ill so aside from a walk/forage at Bramley Falls park on Saturday and the sheep & goats in Calverley graveyard on Sunday, I spent most of the weekend sitting. I like sitting but it was frustrating to think of all the to-do tasks building up while I was lazing around.
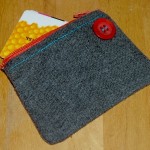
In an effort to achieve at least one thing, I decided to make a flask holder/carrier – because I like taking a water flask out with me when we’re walking the dog but quickly get bored of carrying it.

It’s an adaptation of my never-fails crochet shopping bag pattern (which I should write up over here sometime) and is pretty quick and easy to make – an hour or so, maybe a little longer including the long strap.
Crocheted flask/water bottle holder pattern
Note: this pattern uses British crochet terminology. North America readers (etc) should revise accordingly: our DCs are your SCs, our TCs are your DCs etc.
To make this item, you need to know how to chain, DC, TC, join stitches to finish rounds and tie off. It’s not complicated at all but I fear parts of the pattern are a little confusing – let me know if you hit any problems.
Yarn & hook
This is a great project for using up the ends of yarn balls – it only uses about 20g. Choose a strong yarn, 4ply or DK, and a suitable sized hook – I think mine was a 5mm.
Base
Round 0. Ch 6 and join in a loop.
Round 1. Ch 2 (to be a TC), then *ch3 and TC join into the centre of the loop*. Repeat the * to * section three more times then ch3 and sl st join to the top of the first TC (the ch2). There should be 5 segments as shown.

Round 2. Sl st into the first segment. Ch 2 (to be a TC) then *ch 3, TC join to the top of the next Rd1 TC (inbetween the segments) then ch3 and TC join to the middle of the next segment*. Repeat the * to * section three more times, then ch 3, TC onto the top of the last Rd1 TC, ch3 and join with a sl st to the top of the Rd2 TC (the ch 2). There should be 10 segments as shown. If this sounds confusing, see note #1 below.

Rounds 3 & 4. To give a defined edge to the base, DC three times into each of the 10 segments (30 DC stitches in total). Then DC into each of the Round 3 DCs (another 30 stitches in total). The second row should already be creeping upwards, not outwards.

Sides
Round 5. Sl st 2 to put you in over the middle of the first Rd 2 segment. Ch 2 (to be a TC) then *ch 3 and join to the middle of the next segment with a TC*. Repeat the section between the **s another eight times, then ch 3 and sl st to the finish the round. You don’t want to be adding to the number of segments here, else the base will keep growing out, not up.
Round 6. Sl st 1 into the middle of the segment. Ch 2 (to be a TC) then *ch 3 and join to the middle of the next segment with a TC*. Repeat the section between the **s another eight times, then ch 3 and sl st to the finish the round.

Rounds 7-12. Repeat Round 6 another six times then try it on your flask/bottle – it’ll stretch in use so you don’t want it any more than about two-thirds up the side of the flask. Repeat Round 5 until you reach that level (I added two additional rows on this one but wish I hadn’t).

Top
Rounds 13 & 14. To give a defined edge/strong finish to the top, DC three times into each of the 10 segments (30 DC stitches in total). Then DC into each of the Round 3 DCs (another 30 stitches in total).

Handle
There are three options for the handle: a little loop for use with a carabiner, a long strap to go over the shoulder & across the body, or a combination of the two. I did the latter on this one. The long handle/dual option is by far the most time consuming bit of the project – taking longer than the rest of it put together but that’s not exactly long.
Little loop: Sl st 2 so you’re above the middle of a Rd12 segment then ch 12. Join the end of the chain back to the start of it then DC back along the chain to the other end. Tie off to finish. Use a carabiner or similar to attach the holder to a belt loop or bag strap etc.
Long handle: Sl st 2 so you’re above the middle of a Rd12 segment then ch 180. Join the end of the chain to the Rd12 segment directly opposite the one you started the chain in. DC back along the one side of the chain to the other end then attach it to Rd14 with then turn the project around to DC back along the other side of the chain.
Notes
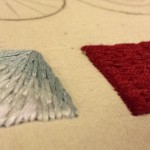
#1. I think Rd2 is confusing – it’s different to every other row and I don’t think I’ve explained it very well so I’ve drawn a pretty picture to illustrate it.

The pink lines are the Rd1 TCs. The yellow lines show how the TC then ch go from the top of the Rd1 TC into the middle of the Rd1 segment. Then the blue lines take another TC from the middle of the Rd1 segment to the top of the next Rd1 TC.
-
 Taking Stock – May 2015
-
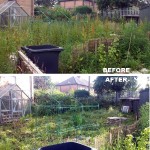
 Making a little more progress at the allotment
-
 Allotment, end of round 1 (ding ding)
-
 Yay, allotment!
-
 Taking stock – June 2014
-
 Do it better
-
 Stitching etc tips from the Knitting & Stitching Show
-
 No Spend November
-
My winter to-do list 2013
-
 Taking stock: a ‘what I’m up to in my absence’ meme
-
 Plummy solid square crochet blanket
-
 Attack of the Crochet Claw
- Jetpack plugin with Stats module needs to be enabled.
-
 My low-spend '11: buy less than 12 items of clothing in 2011
-
Cold smoking cheese - taste testing the first batch
-
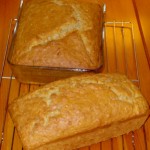 Using up the glut: Marrow cake recipe
-
 How I line dry clothes in winter: my top five tips
-
Spicy marrow chutney recipe
-
 Washing in winter: ideas for reducing laundry?
-
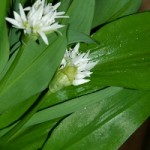 Foraging for wild food: do you forage near roads?
-
Your favourite fiction books with simple living characters/themes?
-
 How I spent my Tuesday afternoon
-
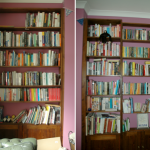 We *heart* books too (warning: picture heavy post!)
-
 Portion control
-
Baking things that'll last

No Comments
Join the conversation and post a comment.
Trackbacks/Pingbacks