

Water-saving: how-to fit water-saving aerators to taps
A few weeks ago, I found out that our local water company Yorkshire Water was giving away some water-saving gizmos to its customers. Our water isn’t metered here so we’re not interested in saving water to save money, but more interested in it from a green point of view — and I guess getting into the habit in case we ever do get a water meter fitted.
As well as a shower aerator, a pretty pointless thing for the toilet cistern and a four-minute shower timer (which I’ll use for eggs), we got two tap aerators and a fitting tool.
We fitted one of the tap aerators in the kitchen yesterday and we’re already noticing the difference. It doesn’t feel like we’re getting less water when we’re washing our hands etc but it takes considerably longer to fill a glass/the kettle – showing how much it’s reduced the water flow.
It was really easy to fit the aerator – you don’t need to turn off the water (well, you do at the tap, but not at the stop cock) and we didn’t even need to use the tool provided (I’m guessing it was a wrench type thing to unscrew tight bits).
Let’s start with a shot of water running from the existing tap – for comparison.

Start by unscrewing the very end bit of the tap. You might need the tool or a wrench if it’s tightly attached. Ours screwed off easily with just a bit of a manly grasp (not a euphemism).

As you can see, it already has an old aerator in it, which spread the water out a little bit. Let’s take it apart…

We’ve got, from left to right, the end of the tap, the old lacklustre aerator and a washer. And replacing old for new…

From left to right now, we’ve got the end of the tap, the new aerator, a sleeve for the aerator and the old washer.
A number of sleeves were included in the aerator kit so we found the one that our tap and slipped the aerator into it:

Then dropped that into the tap end and put the washer on top:

This is what it looks like from the other end (the outside end) — John wasn’t sure which way around the aerator should go so thought it might be useful to show this picture too.

Then screwed all that back onto the tap:

Et voila! Compared to the running water picture at the top, you can see how the water is a lot cloudier – but only cloudy because it’s got air bubbles in it.

You can see the bubbles more easily when it’s flowing onto something…

As I said above, it now takes a lot longer to fill up a glass, or the kettle, which sounds like a bad thing but it’s great to know we’ll be using a lot less water when we’re doing something that’s more a fixed amount of time rather than requiring a fixed amount of water – such as washing our hands, which we do a lot. I would definitely fit them on bathroom/cloakroom taps.
Other posts you might like:
-
 Taking Stock – May 2015
-
 Making a little more progress at the allotment
-
 Allotment, end of round 1 (ding ding)
-
 Yay, allotment!
-
 Taking stock – June 2014
-
 Do it better
-
 Stitching etc tips from the Knitting & Stitching Show
-
 No Spend November
-
My winter to-do list 2013
-
 Taking stock: a ‘what I’m up to in my absence’ meme
-
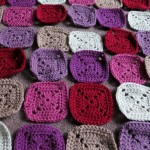 Plummy solid square crochet blanket
-
 Attack of the Crochet Claw
- Jetpack plugin with Stats module needs to be enabled.
-
 My low-spend '11: buy less than 12 items of clothing in 2011
-
Cold smoking cheese - taste testing the first batch
-
 Using up the glut: Marrow cake recipe
-
 How I line dry clothes in winter: my top five tips
-
Spicy marrow chutney recipe
-
 Washing in winter: ideas for reducing laundry?
-
 Foraging for wild food: do you forage near roads?
-
Your favourite fiction books with simple living characters/themes?
-
 How I spent my Tuesday afternoon
-
 We *heart* books too (warning: picture heavy post!)
-
 Portion control
-
Baking things that'll last
