

New (partial) roof for the chicken run
Since we’d offed one of their species on Saturday, I decided to do a nice thing for our chickens on Sunday – I roofed part of their run.
I’d been meaning to do it for a while and had earmarked the polycarbonate sheets that had been the roof of our porch for the project – but when we had the porch replaced in the late summer, I wasn’t fast enough and the sheets were whisked away before I could grab them. Boo. I’ve kept my eyes open for the last few months for another possible roof but as nothing else turned up and it has been getting very muddy down there, I decided to buy some plastic sheeting instead.

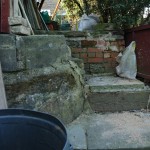
The whole run has always been covered in chicken-wire to keep the foxes out, which made fitting the plastic sheeting rather difficult, especially in the spot I had in mind. The run is on “reclaimed” land – levelling up a steep hill – and on either side, it’s still the original hill. I’m not going to say how I got them into place because I think it would make John & my mum cry (especially as Sunday was icy and so possibly not the best day for clambering around). I’m surprised this blog post isn’t about how I added to my bruise collection*: the really bruised life.

Anyway, my original plan had been to carefully drill holes through the plastic so it wouldn’t crack, then screw them into place. I had an elaborate idea in mind of raising one end to make sure the rain drained away from the run rather than into it but when push came to shove and I was hanging off a tree, I realised that was unrealistic. On John’s suggestion, I ended up tying them onto the chicken wire – and around support beams where appropriate – and that seems to have worked pretty well. If it snows a lot, I’ll have to get into the habit of clearing it off the roofed bit so it doesn’t get too heavy – but snow gathered on the chicken wire too so it was something I had to do last year anyway. I’m not sure how much it’ll hold up in high winds and whether or not the rain will drain in the right way by luck rather than by design but we’ll see – it’s a start. And if it is a giant failure, given the way I’ve tied them on, it’ll be reasonably easy to remove them if needs be and try again.

Between the new roof, the shelters I made last year and the raised coop, they have about 6m2 of covered space in their run now (not including inside the coop) and there is another nearly 4m2 space covered in pallets/trellis so they should have plenty of non-muddy wandering space this winter – which should hopefully keep any mud-related foot problems at bay. I just wish I’d got around to doing it before the mega rain earlier in the month!
* I bruised my knee on a stage combat course last week, then slipped on the ice on Friday, banging my bruised knee again and falling heavily on the top of my foot. I’m rather clumsy – which is another reason why I shouldn’t have been clambering around on an icy day ;)
Other posts you might like:
-
 Taking Stock – May 2015
-
 Making a little more progress at the allotment
-
 Allotment, end of round 1 (ding ding)
-
 Yay, allotment!
-
 Taking stock – June 2014
-
 Do it better
-
 Stitching etc tips from the Knitting & Stitching Show
-
 No Spend November
-
My winter to-do list 2013
-
 Taking stock: a ‘what I’m up to in my absence’ meme
-
 Plummy solid square crochet blanket
-
 Attack of the Crochet Claw
- Jetpack plugin with Stats module needs to be enabled.
-
 My low-spend '11: buy less than 12 items of clothing in 2011
-
 Using up the glut: Marrow cake recipe
-
Cold smoking cheese - taste testing the first batch
-
Spicy marrow chutney recipe
-
 How I line dry clothes in winter: my top five tips
-
 Washing in winter: ideas for reducing laundry?
-
 Foraging for wild food: do you forage near roads?
-
Your favourite fiction books with simple living characters/themes?
-
 Wild plum/cherry plum jam recipe
-
 How I spent my Tuesday afternoon
-
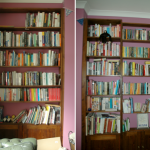 We *heart* books too (warning: picture heavy post!)
-
 Portion control

Congratulations your roof looks nice.
This year I built a poly roofed wood store. Imagine a plastic roofed pergola. It dries it out so much better than the old tarp covered one, I drilled holes first on the ground supported by a bunch of 1m long polystyrene “hills” that cost a fortune for what they were and turned out to be slightly larger than they were supposed to be. Then I leaned over each from underneath to screw it in place with a screwdriver bit in the drill. I was so hesitant about this step but it worked out fine. The trick was to make sure that the holes were all the same distance apart and it helped to lay it all out before I started anything. The holes should be large, probably much larger than you would think necessary, this gives it room to expand and also helps deal with the general errors in drilling. If you drill you should make sure the plastic is kept warm before you do it as the drill can crack the plastic. I used a 3 in one bit which looks like a masonry bit but can cut through wood or plastic just as well I think its titanium or something. I appreciate I didnt’ have to contend with chicken wire in my case so it was probably a lot easier. I did however have that stupid balancing on a stepladder, leaning across a bunch of flimsy plastic, with toes stretched out across the wooden rafters hoping that it all took my weight, lucky but really stupid in hindsight). I invested in much more plastic caps and screws than I should have done, and also went overboard with a bunch of metal bracket supports that were surplus to requirements once I got the main bits screwed in, with this and the poly hills that I still have in the garage the whole thing was probably twice as much as it should have been. I always spend so long planning these projects then end up just screwing stuff together in a hurry in the dark, it has held out with all the worst weather has to offer including snow, which rarely gets bad enough here to cause any real risks.
Hi Jan,
If you drill you should make sure the plastic is kept warm before you do it as the drill can crack the plastic.
Great tip. I only cracked the plastic on one hole – the first one, naturally ;) – after that, I was careful to go slowly with the drill.