

Upcycle an old duvet cover into a frugal bean bag
(Is it just me or does “frugal bean bag” sound like a filthy euphemism? … It’s just me, isn’t it?)
As I mentioned in passing last week during my quick week-off updates, I made a bean bag from some old bedding.
We wanted a fairly sizeable beanbag for the animals to sit on in front of the stove in the office. We wanted one that could be a flat mattress (since that would suit the dog best) but also be pulled up on its side to be a taller seat for us when we needed extra seating. I also wanted one that had an inner liner and a washable cover because, well, everything has to be machine washable in this house.
Perhaps I was looking in the wrong places but my my, big beanbags with liners are expensive! In shops, they were either tiny, unlined or unwashable pleather/suede, or all three. On one website, which was recommended by a friend, it was looking like I’d have to pay about £80 for a beanbag to match my wants – £80! For a bean bag!! GAH!!! So I decided to make my own.

It’s essentially a giant square cushion covered with a removable pillow slip case – but I’ve explained how I made it below.
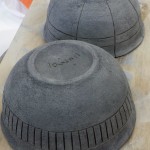
The duvet cover
The original plan was to make my own from some neutral, grown-up fabric I’ve got but then I found this ace retro duvet cover in a charity shop for £1.99 — considerably more fun!

It was a single cover, with one side patterned and the other side boring white. I decided to use the white side for the liner and the patterned side for the washable outer. So the first job was picking it apart – a quick and pleasing job with a stitch ripper.

I was left with two pieces of fabric, both the same size, each about 135cm by 200cm.
Making the liner
Rather than faffing around with segments or side panels, I decided the easiest way to make it was to essentially just make a big square cushion, using the dimensions of the duvet cover to minimise cutting. I hate cutting.
I folded the white piece of fabric in half lengthways (to be double thickness/the two sides of the cushion), right sides touching, and pinned it in place. Then in the same way I’d fold a piece of rectangular piece of paper to make a square piece, I folded it along the diagonal and cut off the excess to make a square.

I sewed up the three open sides, except for a 15cm gap at one corner for filling – as you would do with a basic cushion. Since the lining is basically the one thing between me and a room full of bean bag beans floating all over the place, I left a decent amount of hem allowance and made sure the stitching would made a secure seam. Then I turned the lining bag the correct way out ready for filling.
Filling the liner
I bought a giant bag of bean bag filling from a bricks-and-mortar textiles/homewares shop. I paid £17.99 for 10cubic feet of beans – enough for two giant over-stuffed bean bags, so probably two maybe three more squishy ones. I’ve seen places online that sell it cheaper – but p&p is usually expensive because while it’s light, it’s bulky.
I asked my best bud Katherine on “a scale of 1 to OMG” how much of a mess I’d make with the beans. She replied “OMG to the power of 11”. I surprised us both by being pretty neat!
I made a funnel from an old carrier bag – snipped a hole about 6cm in diameter in the bottom corner and pinned it into the filling hole of the liner bag. I then used a bowl to scoop from the giant bag of beans – the bag/funnel gave me a large target reservoir and the handles looped over my wrist so I could hold it all up easily.

When the liner looked about two-thirds full, I removed the funnel and tightly pinned together the open filling hole, then with Carla’s “help”, sewed it up as tightly as could be! Liner filled & finished!

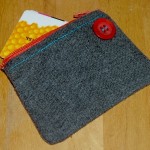
Making the washable cover
My original plan had been to make another cushion cover effort, using a zip to take it on and off. But then I couldn’t find a zip long enough in my stash so I decided to make a slip-on pillow style case instead.
At this point I was blood-sugar crashing a bit so forgot to take pictures, so again I’ll have to rely on a little diagram (below). There are how-tos elsewhere on how to make pillowcases properly though. It didn’t help that it was at this point that Lily decided that Carla shouldn’t monopolise the assistance…

Basically, I shooed the dog away then folded the remaining side of the duvet into a square as above but rather than cutting off the waste this time, I used one side of it for the flap and trimmed down the other side to make a heavy hem.

Working with the wrong sides out/right sides together, I sewed up the open sides and hemmed the heavy hem and hemmed around the flap too. Then I attached the sides of flap to sides of the bag part. I hope that makes some sort of sense! I’ll post better instructions when I make my next bean bag in a few weeks.
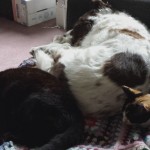
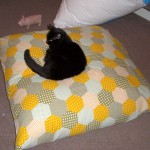
Thankfully, given my blood-sugar had completely crashed by that point, it was finished – I slipped the liner into the cover, jiggled it about a bit then Carla tried it out for size. As you’ll see, it’s not exactly giving under her portly figure – it’s probably stuffed a bit full but I have decided to see how it goes before opening it up – the beans might crush down a bit with use and anyway, I think I’d prefer it too stiff than too floppy.

So, all in all, I spent £1.99 on fabric and used less than half of my beans – let’s say £9-worth. Total beanbag cost = £11. Still not exactly free but much better than £80.
About Me
 I'm Louisa and I live a Really Good Life. I grow, I craft, I cook and I make the most of what I've got instead of forever craving more.
Read more the site on the About page, or browse through the categories below.
I'm Louisa and I live a Really Good Life. I grow, I craft, I cook and I make the most of what I've got instead of forever craving more.
Read more the site on the About page, or browse through the categories below. -
 Taking Stock – May 2015
-
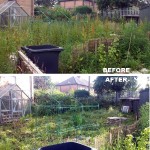
 Making a little more progress at the allotment
-
 Allotment, end of round 1 (ding ding)
-
 Yay, allotment!
-
 Taking stock – June 2014
-
 Do it better
-
 Stitching etc tips from the Knitting & Stitching Show
-
 No Spend November
-
My winter to-do list 2013
-
 Taking stock: a ‘what I’m up to in my absence’ meme
-
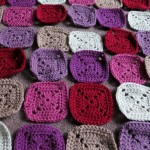 Plummy solid square crochet blanket
-
 Attack of the Crochet Claw
-
 Using up the glut: Marrow cake recipe
-
Spicy marrow chutney recipe
-
 Wild plum/cherry plum jam recipe
-
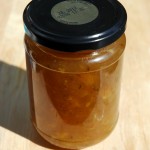 Easy marrow and ginger jam recipe
-
 No omelettes allowed: my five favourite recipes to use up lots of eggs
-
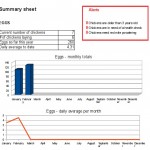 My chicken keeping spreadsheet
-
Plummy solid square crochet blanket
-
 Spicy plum chutney recipe: plum & chilli jam
-
 Foraging for wild food: do you forage near roads?
-
 Upcycle an old duvet cover into a frugal bean bag
-
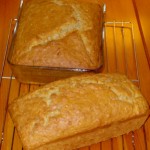
 The wonder that is slow rise bread
-
 Buttery treacle spice biscuits recipe
-
 My low-spend '11: buy less than 12 items of clothing in 2011
-
Cold smoking cheese - taste testing the first batch
-
Using up the glut: Marrow cake recipe
-
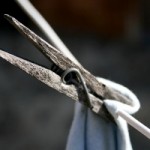 How I line dry clothes in winter: my top five tips
-
Spicy marrow chutney recipe
-
 Washing in winter: ideas for reducing laundry?
-
Foraging for wild food: do you forage near roads?
-
Your favourite fiction books with simple living characters/themes?
-
 How I spent my Tuesday afternoon
-
 We *heart* books too (warning: picture heavy post!)
-
 Portion control
-
Baking things that'll last

I think it turned out great – much better than paying £80. I love your 2 models, your cat looks like ours :)
Thanks – I like how it turned out too :)
And black cats are the best! hurrah for black cats!
I was so inspired I rumaged in the depths of the cupboard in the back room (and got back out alive) and have made something similar for my assortment of cats! Mine have been made out of old duvets and duvet covers. I even made spare covers, one on, one in the wash sort of idea. I then kept going and made bed’s with spare covers for my dog friends or my friends dogs. Knew they’d come in handy if I kept them. All for FREE exept a little of my time. Thanks Louisa x
Sounds great – and the spare cover idea sounds like an especially good idea if your felines shed anything like ours!
I made the beanbag for the dog but actually Boron the cat has claimed it as his own – he looks so tiny on it :) It’s very useful as a spare seat when friends come around too – although we have to battle Boron for it ;)