

Tiered plant stand made from scrap wood
Yesterday I mentioned I finished off my latest scrap wood creation – a plant stand thing.
I can’t remember whether I went looking for inspiration or whether I stumbled upon the idea while looking for something else but about a month ago, I got very excited about the idea of making a tiered plant stand thing which would allow me to double, triple or maybe even quadruple the amount of plant pots I could have in any one area.
There are a few different sorts out there, with different supports and shelves, and I collected a range of pictures together to come up with my own design – one that would be versatile (long shelves not just trays for shelves – although that would use a lot less wood) but most critically, easy to make with my less than stellar woodworking skills. And this is what I came up with:

If it looks wonky, it’s because the floor there is uneven, I spent AGES getting everything level! It was a bit of a pain working out all the angles – I had to use MATHS! ;)

It’s pretty sturdy – supported against the wall by both the top shelf supports and the back batten of the top shelf. I made the side bits – from salvaged decking John’s dad brought over and some joiner’s off-cuts from our woodstore – a few weeks ago but couldn’t find any lengths for the shelves. Then I found six 18mmx38mmx1800mm battens in the garage yesterday, which worked perfectly. Since the wood is all a bit mismatched and it’s not all protected, I think I’m going to paint it with some leftover-from-decorating paint.
The shelves are about 90cm/3ft long, so I’ve now got 270m/9ft of linear growing space in less than a metre of ground space – and all of it raised off the ground which will hopefully deter slugs even the tinest bit!
As it was a bit of an experiment, I’m rather happy with it – another freebie for the garden – hurrah for scrap wood! This stand will probably live where it is now – underneath the office window – but I might make another one for the balcony next to the kitchen for easy-grab salad & herbs.
Read MoreA cracking start to Spring
Oh what a beautiful day!
I know yesterday was officially the first day of Spring but it was a usual sit-at-computer rush-off-to-rehearsal day for me, whereas I got out in the Spring sunshine today. I’d decided to have a day away, or at least largely away from my computer – and couldn’t have scheduled it better weather-wise.
We had our first breakfast al fresco – sitting on the sun trap of a balcony. The idea of having breakfast on a balcony was one of the things that sold the house to us – the balcony faces into the woods and it’s a gorgeous view, even with the trees still leafless:

(The two horizontal strips of green at the bottom of the photo are just over the stream at the bottom of the garden – it’s wild garlic. There is *so much* wild garlic in the woods – and thankfully plenty in places not often frequented by dogs.)
After breakfast, I cleaned out the chicken coop and since I was working hard, I thought some of the chickens should be busy too – I put Lime & Green to work in the portable run I made the other week, weeding one of the veg beds. They worked like troopers…

Except for when they got distracted by a dried leaf caught in the wire.

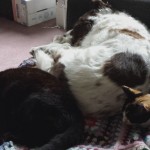
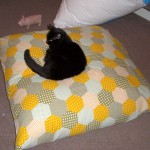
(By the way, since it was sunny, both cats wandered down into the garden, saw the girls in the portable run, thought their luck was in so crouched down – then realised the chickens were a. bigger than them b. had sharp beaks and c. had bigger claws so slunk off to continue their sun worship elsewhere. It was funny to watch them go through the exact same actions.)
Read MoreLearning how to screenprinting

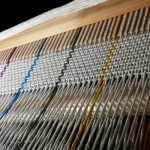
I’ve written on my general personal blog about how we have been learning how to screenprint this weekend. I’ve been itching to try it for a while – it was on my main goals list for 2011, although I’m not sure I mentioned it on my list here because it didn’t seem simple/frugal living related. However, we had such fun that I want to mention it here to encourage everyone else to have a go ;)
The day course introduced us to the basics of screenprinting – the process of creating our own photo-emulsion screens, using paper stencils, printing solid colours, colour blending, and printing onto paper & fabric – and was in itself a lot of fun. But the best thing is the place we did the course, Factory4 in Leeds, offers workshop facilities/equipment for anyone wanting to screenprint (or make fine silver jewellery, woodwork, or frame pictures) but doesn’t have the money or space to buy all the equipment themselves — this means we can practise our skills without having to spend a lot of money. (It’s an hourly fee of £4 to use the equipment, which includes a technician’s support if needed, and £3 to borrow an A2-ish size screen, the photo emulsion for it and the destencilling soap afterwards.)
Actually, our reasons for wanting to try it do have a kinda frugal element – John wants to design his own t-shirts (so will only have to buy plain basic shirts rather than fancy pre-printed ones) and we both want to make some artwork for the house (which will be cheaper than buying it all in – we do like to support independent artists but have a lot of walls to cover!). Once we get better at it, I also like the idea of printing onto recycled/reclaimed materials to give them a new lease of life, so that’ll cut our material costs further. But cost aside, weeee! so much fun!!
Read MoreAnother scrap wood planter
It was too nice today to sit inside – a cold, dull start but warmer this afternoon with some lovely soft winter sun lighting up the trees in the wood.
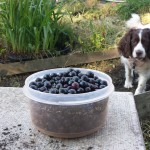
We had a lovely walk in the woods at lunchtime – we took out the neighbours’ year old springer spaniel as well as ten year old Lily, which was a fun change of pace. Sometimes Lily exhausts herself trying to keep up with him but today she was happy for him to run around like a crazy thing while she pottered along. We pottered too – he ran around more than enough for all of us.
After we’d got home from that, I did a quick hours work then headed into the garden to make another scrap wood planter. John’s dad brings us lots of short lengths of scrap timber – the end of planks from a joiners – which aren’t long enough to do much with, but I had an idea the other day for using them to make a planter – and this is the result:

Whenever I’m doing anything with wood, I try to minimise the amount of sawing I have to do because I’m lazy (and have an aversion to sawing after having an awful saw for a long time – the current one is actually really good and easy to use). Conveniently all the flat pieces for the sides and the battens for the bottom were already cut to size – or rather, the sides were all the same size and I let than dictate the height/width of the planter, then found enough suitably sized battens to fit along the bottom. It’s about 1m/3ft long and about 30cm/1ft wide & tall.
Like the other ones I’ve built, it’s made completely from scrap – the short lengths and reusing lengths of structural timber/decking that John’s dad has reclaimed/skip-dived – and I’ll line it with soil bags etc so the only cost are the screws. That was not inconsiderably on this one though – I used a lot of screws! – but at least it’ll double as a really small bomb shelter if we ever have another blitz. ;) If some flat wood – about 1cm by 5cm – turns up, I might use it to make a pretty lip to cover up (and protect) the top rim.
I’m really enjoying making these planters at the moment and hope to get another couple made before I need to start concentrating on planting things in them!
Read MoreSoap making book reviews: Soapmaking by Sarah Ade and The Natural Soap Book by Susan Miller Cavitch
Ahead of making soap for the first time a fortnight ago, I bought and read two soap making books – I thought it would be best to get familiar with the techniques before I started playing with burn-your-flesh lye.
The books I bought were:
- ‘Soapmaking’ by Sarah Ade, part of the New Holland Self-Sufficiency series, and,
- ‘The Natural Soap Book: Making Herbal and Vegetable-based Soaps’ by Susan Miller Cavitch
 Both came with glowing reviews on Amazon but, to be frank, neither book particularly did it for me. I spent a lot of time looking for what I thought would be the most suitable books but still, I may have had overly high expectations or completely wrong ones so I’ll start with some positives of both before I start with my criticisms.
Both are nice books to look at and easy to read. ‘The Natural Soap Book’ is particularly lovely – it’s printed in a lovely purple font on soft cream paper, with clear, relevant line illustrations. There is a lot of text in it – considerably more than ‘Soapmaking’ – but there is still enough “whitespace” to make it pleasant to read and not feel cluttered or dense.
Both books include pages on soap-making history & theory, useful information on the chemistry of soap making (saponification charts etc) and the characteristics of different oils/butters, and scents and other (natural) addictives. ‘The Natural Soap Book’ went a bit further, as you may expect from a more advanced book, but ‘Soapmaking’ provided a decent amount of information too.
But (and this is where the criticisms start) for all their talk about different soaps and oils/butters, the recipes seem lacking in variety. All but one recipe in each book contains olive oil, palm oil and coconut oil – not just in there a little bit, but the majority (fat) ingredients in every case. Now I know the authors are both experienced soap makers and I’m not so perhaps I’m wanting something that’s stupid, but I’d have liked different types of soap mentioned – a 100% olive oil recipe (since that was one of reasons I started looking at making soap), or some without palm oil or without coconut oil, or heck, without olive oil. It felt like there was a basic recipe that they always used (admittedly perhaps with good reason) and the only different thing was the essential oils or the odd bit of some special oil (‘Soapmaking’ was particularly guilty of this – they felt very much variations on a theme except for the liquid soap recipe in the “taking soap further” section).
Read MoreMy first soap
I made some soap for the first time last week. It took FOREVER to trace. I wrote a blog post about that but didn’t explain any more about my soap making because, well, frankly, at that point, it looked like it was going to be a big fat fail.

Even though it had reached what could be considered trace, it still felt very sloppy when I was pouring it into the moulds and even overnight and over the next night, it was harder but still very soft. The directions I’d read had said to take it out of the moulds after a couple of days – mine would have still blobbed all over the place at that point. But it clearly was still curing and it was more than ready to leave the moulds today – a week after it was made. (It was probably ready for tipping out by Wednesday – it was a lot paler and seemed like it would hold its shape – but I was just busy with other stuff so thought it would be better to leave it rather than rush it.)
I made two batches – I’ll post the recipes & cost breakdown once I know that it is actually a success and they’re good to use but for now, I’ll say the first was a 100% olive oil soap, and the second was a third olive oil and two-thirds other generic veg oils/shortening — everything bought from supermarkets. As I’ll explain more when I review the two soap-making books I bought, we’re pretty utilitarian when it comes to our soaps – we want them to get us clean, to not be harsh & drying, and to smell alright. We want them to create minimal waste & be as frugal as possible. This is particularly important for me while I’m learning the skills – if I make a mistake, it’s nothing more than a few quid and some time; if I was buying neem oil, shea butter and essential oils, I’d not only be paying more for the ingredients, I’d be paying for postage & packing too and having to wait for them to arrive too.
As expected, the 100% olive oil soap is considerably paler & already harder than the mixed oils one – the veg shortening keeps it that bit softer. Because I ended up making a lot more than I’d intended in one day, I had to get a bit more creative about the moulds than I thought I would at the start. The 100% soap used an old plastic fruit tray & an old deep oven tray as moulds.
The mixed oil one got the choicest mould – a long flat tray with a lid (from when we bought a big pack of ostrich burgers from the farmers market) – but its overflow containers weren’t as suitable really – one of the square olive oil bottles and an ice cream bucket. They were more awkward to use but have resulted in interesting shaped soaps.

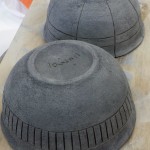
Once I’d popped everything out and cut it to size, I thought “I’ll put this in the airing cupboard to keep curing and drying for the next few weeks”. Then I had a “doh!” moment – the airing cupboard got pulled out by our bathroom refitters on Monday! I hadn’t acted quick enough to keep the racks I’d made which would have been perfect as drying racks (I did though save the cupboard doors – one of which I used as a chopping board for the soap, and the others will make a raised bed). So anyway, I needed something to use for drying racks so yet again, I raided the scrap wood store and twenty minutes later:

A drying rack! It’s a very rough & ready job, done without any measuring hence the slats being a bit wonky, but it’ll do fine for this purpose.

Now the soap is on the new rack drying in the attic room. I guess I shouldn’t declare it a resounding success just yet until it’s finished and we can try it, but after a few days of foreboding failure, it looks a lot more hopeful now!
Read MoreAbout Me
 I'm Louisa and I live a Really Good Life. I grow, I craft, I cook and I make the most of what I've got instead of forever craving more.
Read more the site on the About page, or browse through the categories below.
I'm Louisa and I live a Really Good Life. I grow, I craft, I cook and I make the most of what I've got instead of forever craving more.
Read more the site on the About page, or browse through the categories below. -
 Taking Stock – May 2015
-
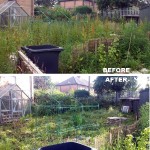
 Making a little more progress at the allotment
-
 Allotment, end of round 1 (ding ding)
-
 Yay, allotment!
-
 Taking stock – June 2014
-
 Do it better
-
 Stitching etc tips from the Knitting & Stitching Show
-
 No Spend November
-
My winter to-do list 2013
-
 Taking stock: a ‘what I’m up to in my absence’ meme
-
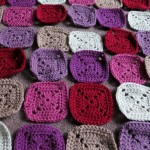 Plummy solid square crochet blanket
-
 Attack of the Crochet Claw
-
 Using up the glut: Marrow cake recipe
-
Spicy marrow chutney recipe
-
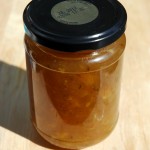
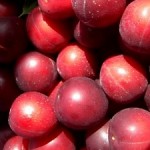 Wild plum/cherry plum jam recipe
-
 Easy marrow and ginger jam recipe
-
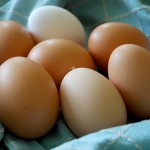 No omelettes allowed: my five favourite recipes to use up lots of eggs
-
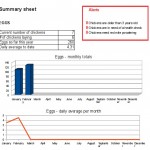 My chicken keeping spreadsheet
-
Plummy solid square crochet blanket
-
 Spicy plum chutney recipe: plum & chilli jam
-
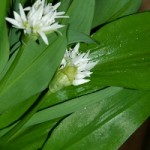 Foraging for wild food: do you forage near roads?
-
 Upcycle an old duvet cover into a frugal bean bag
-
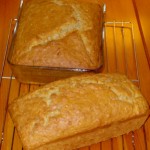
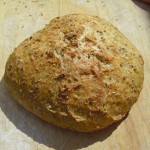 The wonder that is slow rise bread
-
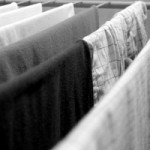
 How I line dry clothes in winter: my top five tips
-
 My low-spend '11: buy less than 12 items of clothing in 2011
-
Cold smoking cheese - taste testing the first batch
-
Using up the glut: Marrow cake recipe
-
How I line dry clothes in winter: my top five tips
-
Spicy marrow chutney recipe
-
 Washing in winter: ideas for reducing laundry?
-
Foraging for wild food: do you forage near roads?
-
Your favourite fiction books with simple living characters/themes?
-
 How I spent my Tuesday afternoon
-
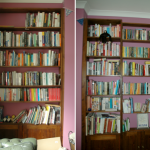 We *heart* books too (warning: picture heavy post!)
-
 Portion control
-
Baking things that'll last
